OK. Part.2! In this post, we will focus on object with hard edges like booleaned model or CAD data.
Booleand Model
Booleaned model is usually pretty easy. Applying Retopology modifier, set the target number and pressing Compute is enough. But, again it might fail sometime, and you simply want to get better result. So, here is some tips for booleaned model.
Tips
- Utilize Boolean Seams for very low angle sharp edges
- Regularize option can help to get more even quad distribution and prevent spiral loops.
- Adding Subdivide modifier can help a lot to solve and get better result.
- Having some support edges helps to get better edge flow. Especially for flat circular shapes.
Example
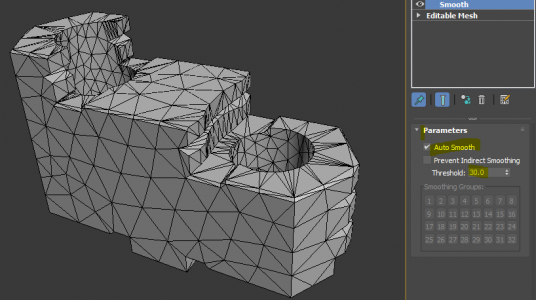
Here is an example. I just apply Retopology modifier, set target to 3000 and just pressed Compute. Auto Edge was on with Smoothing group by default. We got something . But, the topology doesn’t look that great, especially the center circle.
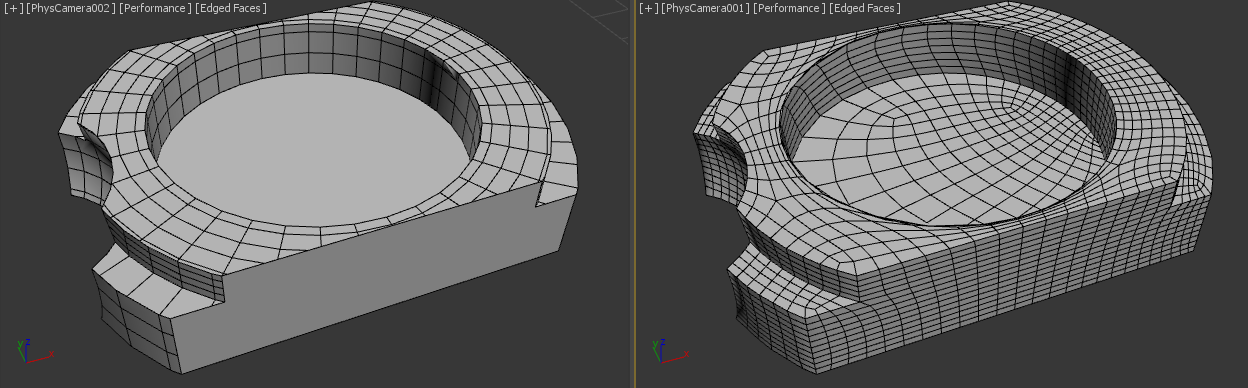
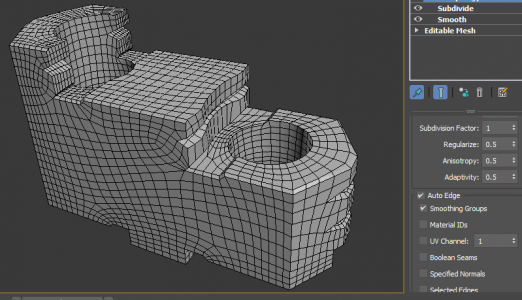
So, I went back to the center boolean operand and give some Cap segments. You can see it makes better edge flow on the big one circular ngon.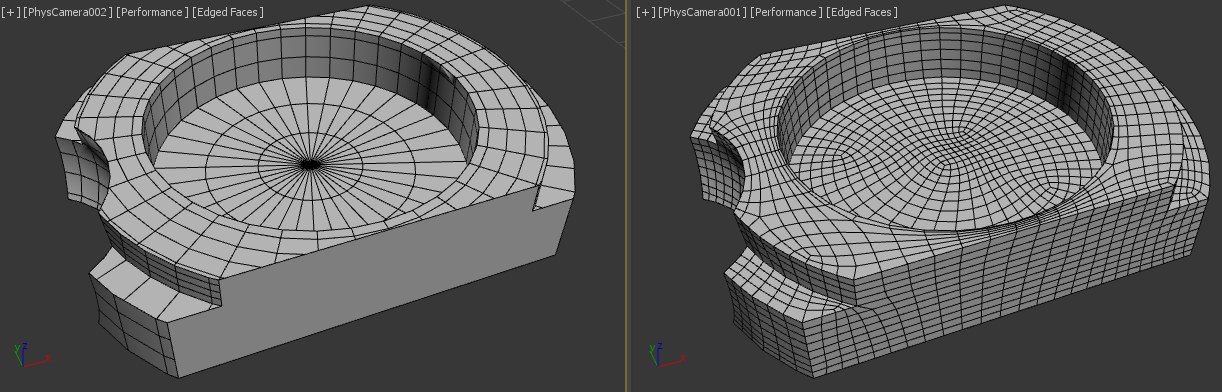
Or, you can just add Subdivide modifier. I usually use “Adaptive” option with default. You can see the edge flow is a lot better for both center circular area and front flat face.
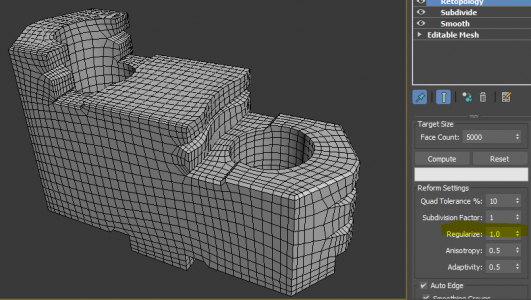
Let6’s see one more example. For this kinds of source object, you must Subdivide.

The Retopology result looks good. But, it has an issue. It created the infamous spirals. I fixed with by increasing Regularize to 1.0. Again this option doesn’t guarantee to remove all spirals. But, certainly worth to try.

CAD Data
Source Preparation
I guess I don’t need to explain how bad models from CAD can be. You all already know. The new algorithms in Subdivide modifier certainly does great jobs for making more Reform friendly faces. But, the mesh has split edges and inverted normal and overlapped double faces what not. Reform nor Subdivide will fail. Until we have T-1000 to retopo, you still gotta do what you gotta do. Here are some notes on mesh preparation.
- Weld split edges and unwelded vertex. Reform would now know if that’s real edge boundary you want to keep or just bad meshed. The easiest way to check this is applying Relax or TurboSmooth. You will be able to see split edge easily. Then, you could apply Vertex Weld modifier with Threshold 0.001 to fix it.
- 3dsMax 2021.3 provide Mesh Cleaner modifier. Try that. It also fix some issues.
- Check if normal is flipped between neighboring faces. Unify option in Normal modifier could help.
- Delete very small random elements with only few polygons especially for scanned data.
- Sometimes Quadrify modifier fixes bad topology since it rebuilds meshes. You can also try TurboSmooth with iteration 0.
Tips
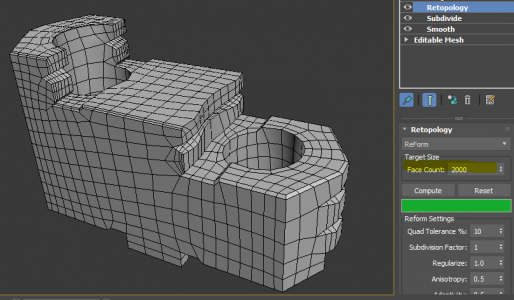
- If it is small part, you can just treat like booleaned model, But, if it has complicated shape, evaluate how much minimum target is needed with Auto Edge OFF.
If the target is too low, Reform often cause “IPOPT maximum iterations exceeded” error” which means basically Reform saying “I can’t solve this.”. By turning off Auto Edge, you can quickly check how much target is needed. - When you Auto Edge, you need enough information within the auto edge boundaries. If you don’t have enough information, again you will meet “IPOPT maximum iterations exceeded” error”. To increase the information, there are 2 options. 1) Subdivide more 2) Remove auto edge condition. For example, if you use UV seams, you could stitch unnecessary seams. If you use Smoothing group, you can smooth some minor edges.
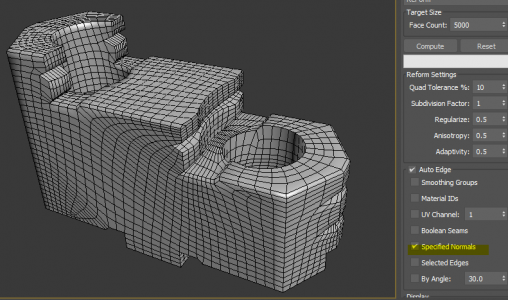
- Check if your hard edge is coming from the smoothing group or explicit normal. If you only have explicit normals for hard edges and turning on only smoothing group means you don’t get any hard edges. If you are lazy like me,. you can just use Angle option instead of Smoothing Group or Specified Nornal option.
- Sometimes model could have bad smoothing group and that prevent Subdivide modifier to work properly. Use Smooth modifier to clean up smoothing group.
- Since Retopology doesn’t preserve mesh data yet. It will look all smooth after it solves. Apply Smooth or Weighted Normal to check hard edges.
- Often CAD data has nice UV seams, utilize it.
Example
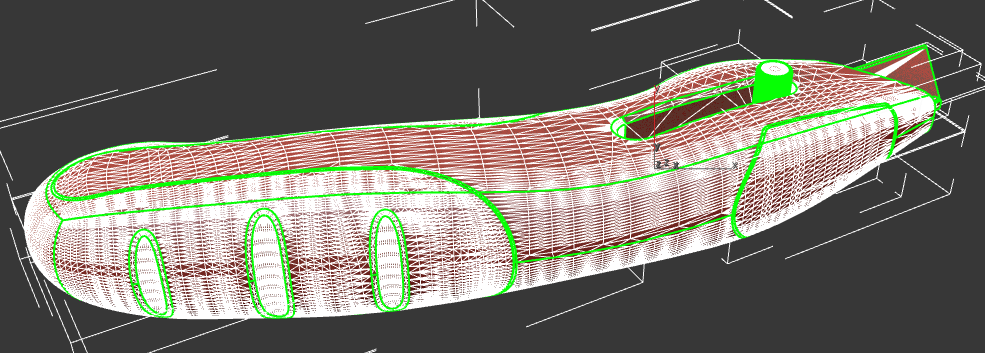
This is a part from Fusion 360 sample scene. It had a unique problem. So, I thought that it was good example to show how I processed the model. You don’t have to go through like this for every model!


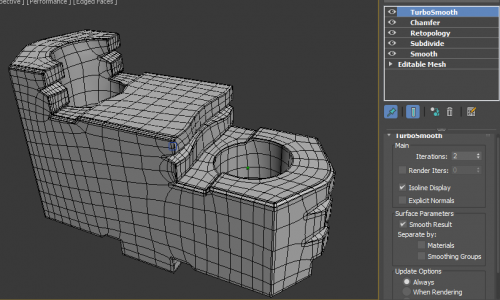
Then, I was thinking how about go lower res model and TurboSmooth?
OK, I shared all things I have learned during beta testing. If you think it is helpful. Please visit renderStacks!
Also don’t forget to check Autodesk Learning Channel Retopology Tutorial.
https://www.youtube.com/watch?v=sKEu2Gs3G_U
https://www.youtube.com/watch?v=HhUMdy-0kSI
https://www.youtube.com/watch?v=AUikqN_lVPc