If you’ve installed the Windows 11 24H2 update, you may notice that some of your macro scripts and plugins have suddenly gone missing. The most obvious symptom is toolbar buttons indicating the script is missing, or custom hotkeys for the scripts no longer working.
So, what’s happening?
According to the 3ds Max developers:
Windows 11 24H2 sets the #system attribute on the following folder: C:\Users\<user>\AppData\Local
As a security measure, 3ds Max does not load startup scripts (including macroscripts) from folders with either the #system or #hidden attribute set.
If you check the max.log file, you’ll see something like this:
By relocating all relevant files outside the ENU folder, as outlined in the tutorials, you can eliminate the need to repeatedly configure your scripts and plugins—whether for new software versions, new machines, or after resetting the ENU folder. Personally, I install a beta version of 3ds Max every two weeks, and since setting this up, I haven’t needed to reinstall any scripts.
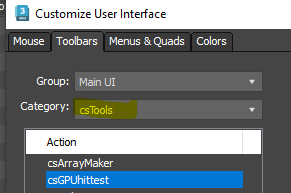
This script allows you to toggle GPU hit testing on or off. You can create a toolbar button that displays the current status of GPU hit testing and enables you to switch it on or off.
It is under “csTools”
So, what the heck is GPU hit test?
When navigating the 3ds Max viewport, 3ds Max often needs to determine what is underneath the cursor.
For example, in 3ds Max, when you hover over an object, it shows the object’s name under the cursor. When zooming or panning, 3ds Max must calculate the cursor’s 3D position. Similarly, when selecting an object or sub-object, 3ds Max needs to determine what is underneath the cursor.
This process is called hit testing. 3dsMax cast a ray from the cursor point and detect that the ray hits. So, as you can expect, the more object and polygon you have, the more time. If you have ever experienced a hiccup for slight delay when you start zoom, pan or select object. That could be caused by the hit test time.
Around 3ds Max 2014, when the development team was focused on improving hit testing performance, they created a GPU-based version of hit testing. However, this approach had some issues, and since 3ds Max still had a software driver mode that relied on CPU hit testing, the team decided to improve the CPU version instead. Eventually, they achieved similar performance with the CPU, and the GPU version was gradually forgotten.
However, the code for the GPU version was still present, and it could be enabled using Maxscript.
Now, in 3ds Max 2025.2, there is a bug in CPU hit testing, and enabling the GPU version can be used as a workaround. Interestingly, after a decade of GPU advancements, it also appears to deliver better results.
I’ve talked to some of my colleagues and most of them have massive viewport performance gains with this enabled. On average they have high core count CPUs (but lower Ghz ~= 3Ghz) but quite beefy Nvidia cards. But indeed it comes with some drawbacks, so far I (only) found that:
You can’t select the PhysicalCamera object unless it’s targeted (then you can select the target line, but even that is wonky and works only with region selection) or also works if you select with a big rectangle around it so you select the (invisible) cone as well, no problem with the other camera objects.
ForestPack, RailClone, if disabled or not generating anything can only be selected with region selection.
Most of the Forces and Deflectors can only be selected with region selection.
I have no problems with splines, lights, meshes, or selecting any of the subobjects in both low or high poly objects, in a mix of scenes.
I found so far that, I have far better accuracy when selecting objects in my scene. No more selecting objects behind the view for instance, some objects were hardly selectable in some cases, I don’t have that anymore. In some scenes (didn’t have to be big or complex even), there was always one second delay before panning or orbitting, this has completely vanished as well as a higher FPS in viewport 2-3x sometimes, and a lot snappier navigation.
With the script, you could easily switch between CPU/GPU hit test as you need.
I know a lot of 3dsMax users uses maxstart.max to set their default working environment. While that is certainly a convenient method. I haven’t used that for more than 10 years. Here is why.
It replaces everything. It is a load/save. I can’t pick and choose what to set. For example, all the renderer settings are saved and loaded. If the renderer developer changes some default value for their new feature. Your maxstart.max from the older version will override all that settings.
It is hard to know what you actually have set. There is no trace whatsoever what you have changed. If someone accidently changed settings and overwrote the file, there is no way to know until someone has an issue. This is actually the most important reason for me to switch to startup script.
Obviously there are settings that aren’t stored in a max file.
It is rare and probably ok now. But, back in the day, there was a bug that maxstart.max was loaded AFTER I already loaded a max file.
This is a sample startup template that you can use as a starter point. This include the #script and #userscripts folder setup that I posted in another post. Now I just throw this script in my “ADSK_3DSMAX_STARTUPSCRIPTS_ADDON_DIR” folder and good to go forever!
setdir #scripts @"D:\PROJECT\_maxDefault\scripts\"
setdir #userscripts @"D:\PROJECT\_maxDefault\scripts\"

-- system unit
DisplayType = #Generic
units.SystemType = #Inches
units.SystemScale = 1

-- animation
frameRate = 24
animationRange = interval 1 72
maxOps.autoKeyDefaultKeyOn = true
maxOps.autoKeyDefaultKeyTime = 1

-- gamma
IDisplayGamma.colorCorrectionMode = #gamma
IDisplayGamma.affectMEdit = true
IDisplayGamma.affectColorPickers = true
displayGamma = 2.2
fileInGamma = 2.2
fileOutGamma  = 2.2

-- renderer
if vray == undefined then (
    renderers.current = Arnold()
)
else(
    renderers.current = VRay()
)

-- autoback
autosave.Enable = true
autosave.NumberOfFiles  = 20
autosave.Interval = 10.0

-- UI
-- hide viewcube
ViewCubeOps.Visibility = false
-- hide Sign In
qtmax = python.import "qtmax"
(((qtmax.GetQMaxMainWindow()).menuBar()).children() as array)[2].close()

-- Viewport
-- Set all viewport background as solid
actionMan.executeAction 0 "618"

callbacks.removeScripts id:#startup4reset
callbacks.addScript #systemPostReset filename:(getSourceFileName()) id:#startup4reset
callbacks.removeScripts id:#startup4new
callbacks.addScript #systemPostNew filename:(getSourceFileName()) id:#startup4new

– To prevent “Do you want to savr?” dialog after fresh start
setSaveRequired false

format "startup script is loaded\n"
First check this video. 4.7 million tris/2.4 million verts playing @ 49fps on GTX960/Ryzen 2700X
I know you can not believe this. So, what’s the secret sauce? Alembic Performance Mode.
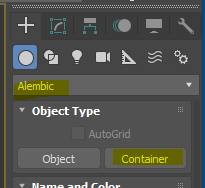
3dsMax 2016 introduced alembic import/export into 3dsMax. One of the feature was Performance Mode in Alembic Container object, the auto generated root object when you import alembic.
It does 2 thing.
Generate a Nitrous ready animated GPU cache of all children.
Temporarily hide all children from scene to clock any evaluation.
Even tho it was originally developed for only alembic cache, it added support for any generic object in 3dsMax 2017. So, if you make an Alembic Container object and link any object under it. You can generate the GPU for the objects just like alembic objects.
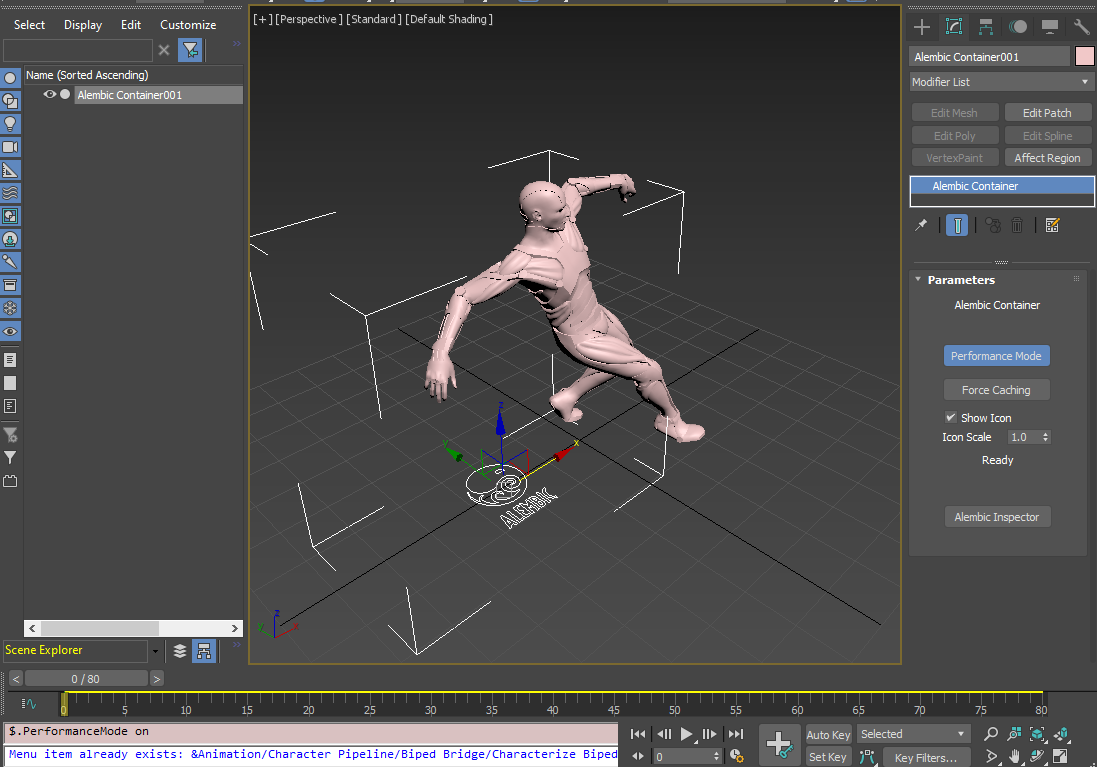
Like this. You can keep the original rig hierarchy under AlembicContainer. AlembicContainer will pick up all descendant under him.
Now,Click “Performance Mode” button. You can see all object under AlembicContainer disappeared from Scene Explorer, and all geometries are combined as one cache. You can also see yellow bar on timeline which means indicated that uncached frame.
Now if you go to any frames, that frame will be cached or play animation while turn off Real time playback to make sure for max to evaluate every frame.
Or, there is a better way. just press “Force Caching” button.
Then, you will see the yellow bar is progressing as green bar.
Make sure turn off the above “Real time”, and try to scrub or play animation. This guy was playing at 42fps before. Now it is playing at 140fps.
So, this is how I could play 4.7 million tri at 48fps.
This is not perfect. But, when you have to light heavy scene, it could be very useful. Or, if you need to make preview from multiple angles. It could save time, too. But, this feature is not play well with Real time option(literally). So, it will be hard to use for animation real time preview.
A fewthing…
You can choose to cache geometry only since anything other than geometry will not be include the cache in anyway. But, if you put the entire rig under AlembicContainer, it will block the evaluation of the rig which will improve fps even more.
Even tho you could do this in 3dsMax 2017+, I recommend to use 2019+ because 2019 would only cache animation range and a lot stable than previous version.
Now I want to ask you a favor. as you can see this tool has amazing potential. But, it also misses some features. I hope I could save/load cache instead of re-generating every time when I open max file. Also, I want to explicitly choose object to cache instead of relying on hierarchy. Also, it doesn’t like when Real time playback is On. So, I created user idea item and need your vote.
Often the riggers skin a low res character and use it to drive hires version of character with SkinWrap modifier.
When you use SkinWrap, your driver object need to be Mesh object. If it is not, it will convert to poly under the hood. The mesh <> poly conversion price is very high.When I tested this originally in 3dsMax 2014. The test result was 9.75fps vs 17.89fps. I retested other file in 2021.3. The difference was 10.8fps vs 13.1 fps. So, I guess there has been some progress. It is still taxing 30%.
Skin modifier doesn’t care about poly or mesh. Therefore, if your base object is Editable Poly, just apply Mesh Select before Skin. You will get performance boost.
has someone experienced that a rotation script controller gets broken/stops calculating properly when it was created with the timerange set e.g. 0-100f and afterwards timeline gets extended to let’s say 0-500f and you start animating with autokey the affected objects, which have the script controller?
I had the experience, too. This could happen in all procedural controllers like Script, Noise controller or Expression controller. What is the solution? One of the most Sr. 3dsMax developer Larry Minton chimed in and gave the answer.
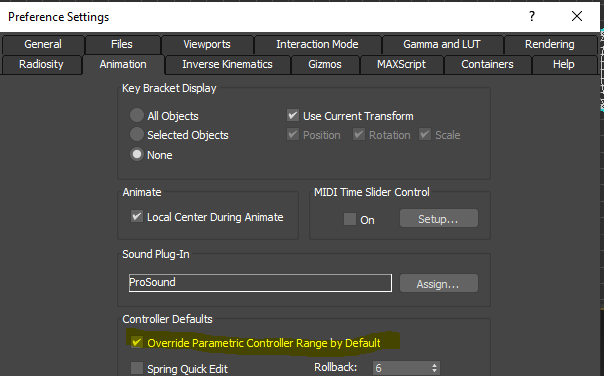
When max creates procedural controllers, by default the controller range is set to be ignored. The setting on whether this is done is controlled by the following 3dsmax.ini setting:
[AnimationPreferences] IgnoreControllerRange = 1
This setting is exposed to maxscript via: maxops.overrideControllerRangeDefault
And is in the Preferences dialog in the Animation tab in the Controller Defaults group.
Apparently when these controllers were created this option was off. Or this is an extremely old file, this option went into max back in 2005.
You can turn this override back on for these controllers by saying: c = getclassinstances rotation_script enableORTs c false
This is the settiing. It is on by default and should be ON.
If you want to make this to be on. You can run this code as a startup script.
maxops.overrideControllerRangeDefault = true
If you already have finished the rig and even animated it. Then, you can use this code to fix for a class of controller. This code is for rotation script controller. If you want to reset all Noise position controller. Swap rotation_script to noise_position.
c = getclassinstances rotation_script
enableORTs c false
UPDATE! Fully multi-threaded explicit normal calculation has been implemented in 3dsMax 2022.1. Now, the explicit normal version of model is deforming at 2.8fps( was 0.6 fps). That’s almost 450% improvement. BUT, please remember still the best way to make the deformation faster is not having 11 million extra normals. converting explicit normal as smoothing group will give you 17fps.
The models I have been dealing with in 3dsMax have been mostly internally made or purchased as .max file, which means I usually do not have explicit normals on my model. If you make a model in 3dsMax, you usually smoothing group instead of explicit normal.
But, most other DCCs are using explicit normal. Which means when you import fbx, obj or alembic. You will be likely to have a lot of explicit normals. I mean a lot. All this explicit normal also need to be recalculated when your object is deforming, which means it can have a great impact on your animation playback performance.
Recently I have learned the impact of normal calculation is HUGE. I mean really HUGE. Another reason why this issue surfaces more recently is that 3dsMax dev have beenputting a lot of effort to preverve explicit normal in various modifier. In the past, many modifiers had destroyed on the stack, now more explicit normals have preserved and causing slow down.
I chose the biggest one, MT_PM_Albizia_saman_01_01_H, and applied animated Bend modifier.It has 4,4mil verts and 3.8mil tris. This is what it looks like in my Ryzen 2700X(kinda old… I know). I turned off real time playback.
The native max mesh from .max file plays at around 14fps. Not bad for 4.4 million verts animation. Now I imported the fbx version of same tree. I got 0.6fps. In other wards, max mesh took less than 2 second to play 24 frames. fbx mesh took 36 second to play 24 frames. That’s almost 20 times slower! When I check the amount of explicit normal, there were 11.399 million normals! File size also jumped from 294M to 645M! This mesh has total 11,399,301 normals. 11 million! Essentially you mesh becomes almost 16 million verts instead of 4.4 million.
3dsMax native meshMesh from fbx with explicit normal
How to solve this issue
First of all, this is why it is always better if you stay in 3dsMax all the time. The native data is always the best. But, if you have to get data from outside of 3dsMax. The ultimate fix issue would be converting to smoothing group and remove all explicit normals. Unfortunately, I have not found a good way to do this for 4.4 million verts model.
So, I took a little bit of time to find a solution, and here is two work arounds.
Apply Mesh Select for Editable Poly, Smooth for Editable Mesh and set to “Off in render”
Some may think “why not Edit Normal modifier?” because it turns out that Edit Normals can not completely remove normal interface. So far the only way to completely wipe out explicit normal is applying Mesh Select modifier on Editable Poly or Smooth modifier on Editable Mesh. Then, by setting this to Off in render, you wipe out explicit normals only for viewport and get correct smoothing while rendering.
So, by doing this, I got around 9fps. That’s a lot better than 0.6fps. That’s 15 times faster.
Do not turn on Auto Smooth on 4.4 million verts model. You don’t need to smooth anything. Just applying Smooth modifier on Editable Mesh will wipe out all normals. Same for Mesh Select, just apply it and change to “Off in Render”.
Conclusion
Use always the native mesh if you can. The native mesh is always the best.
Use always Smoothing group instead of explicit normal if you can.
“Smooth” to wipe out explicit normal in Editable Mesh. “Mesh Select” to wipe out explicit normal in Editable Poly. Edit Normals modifier can not do this.
After the model is imported, always try this if the model has animation.
As you can read the below paragraph, having any explicit normal will make 3dsMax calculate something all the time. Even tho you have an explicit normal per vetex(Usually it is a lot more), it is essentially same as having one more mesh. in the above case, it had 11.4 million explicit normals, which means it is same as having 4 trees than 1 tree. On top of that, this would happen for each modifier after animated modifier. So, this tip will be always valid i n the future.
Don’t just assume 3dsMax would be slow for deforming hires mesh. If you for really low fps, always try something. It would be always case by case But, generally speaking, 3dsMax should not havce problem playing more than miilion verts around 10fps.
Technical details
One of the main 3dsMax developer, Peter Watje, game some insight about this issue. I’m sharing the full text. It is must read for any 3dsMax users who want to know the technical details. Thanks, Peter!
Mesh Normal Interface is really the correct name but basically it is an object that is attached to the mesh when you want to override the smoothing groups. It lets you describe normals by smoothing group, or by which faces they are attached to or by the user explicitly setting the value changing the normal direction. It carries around a lot of data even if you don’t have any explicit normals. So for instance if you Box and you put an Edit Normals all the normals start out as Unspecified Normals and are colored blue which means the normals are generated by smoothing groups. Then there are Specified Normals in which case the normal is still computed but the faces that are used are determined by the user. For instance if you Unify some normals they become a Specified Normals(cyan) and the normal is computed by all the faces the original normals where attached to, Finally there are Explicit Normals(green) which the changes the direction of the normal and that normal is no longer computed in anyway. All that data needs to be stored in the Mesh Normal Interface.
Reset Normals sets all the normals back to Unspecified. The Mesh Normal Interface is still there it just uses the smoothing groups to compute the normals but there is still alot of data there.
When it comes to performance it breaks down to were the normals are computed and how much data is copied to create them. With no Mesh Normal Interface the normals are created when the mesh is displayed and is actually done by a shader that takes the mesh and the smoothing groups and generates the normals directly on the display mesh. It is really fast which is why in some cases when you put certain modifiers on the stack that strip out the Mesh Normal Interface it becomes faster.
The other way performance path is thru the Mesh Normal Interface. Since it is data on an object that flows up the stack that means it may need to be copied which is a heavy weight operation. It also means that any geometry changing modifiers need to also deform the explicit normals in addition to the vertices. So when you come to the display all Specified and Unspecified Normals need to be computed if they were not already and merged with the Explicit Normals and then attached to the display geometry. So you performance is determined mainly by how heavy weight your stack was. Previously the stack was super conservative dealing with normal. It did extra copies and the deforming of normals on a single thread. We are looking at making it less conservative to get better performance but that might bring up other unforeseen issues.
A Tip in a tip
How to set modifier to work only in viewport? Right click menu of the modifier. You can set a modifier to on/off or on/off only in render or viewport.
When your cursor is hovering over an object in the viewport, you can see that a tooltip pops up and shows object name. 3dsMax 2017+ allow you to customize the viewport tooltip of the active viewport. You can not only show any data you want but also have a custom style using a subset of html tags.
This is a template code for a custom viewport tooltip.
global genTooltip
fn genTooltip = (
local obj = callbacks.notificationParam() -- Getting the objects under cursor from callback
local nodeName = obj.name
local mtlName = (if obj.material == undefined then ("undefined") else (obj.material.name))
local faceNum = try(obj.mesh.numfaces as string)catch("0")
local vertsNum = try(obj.mesh.verts.count as string)catch("0")
local tooltipText = "<u><b><font color=blue size=6>" + nodeName + "</b></font></u><br>"
tooltipText += "<font  size=4>Layer : "+ obj.layer.name + "</font><br>"
tooltipText += "<font  size=4>Material : "+ mtlName + "</font><br>"
tooltipText += "Verts Count: " + vertsNum + "<br>"
tooltipText += "Face Count: " + faceNum + ""
viewport.appendtooltip tooltipText
)
callbacks.removeScripts id:#MXSVIewportTooltip
callbacks.addScript #preViewportTooltip "genTooltip()" id:#MXSVIewportTooltip
Let’s see what’s happening here.
First, we made a global function, genTooltip , to assemble the tooltip text and add to viewport. The first line local obj = callbacks.notificationParam() is how you get the the objects under cursor from callback. It is what it is. Don’t touch it. 🙂
Then we build the text for the tooltip, As you can see, you can use a subset of html tags. The devloper mentioned to check this document. http://doc.qt.io/qt-4.8/richtext-html-subset.html
The above code will make a bold(<b></b>) big blue(<font color=blue size=6></font>) object name with underline(<u></u>). Adding <br> is like adding enter to make a new line. Then, the size 4 layer name and the material name will be added. Then, normal size verts count and face count will be added.
After you build the text to display,viewport.appendtooltip tooltipText will resister the text as tooltip.
Lastly, we call this genTooltip function as #preViewportTooltip callback. That’s the lase 2 line. If copy/paste the above code into Maxscript Editor and run this once with CTRL+E, it will last for the session.
If you are lazy like me, you can copy/paste the above code into notepad. Then, save as “customViewportTooltip.ms” in the user startup script folder. C:\Users\[username]\AppData\Local\Autodesk\3dsMax\2020 – 64bit\ENU\scripts\startup
OK. if you are lazy again, type this in the listener and press num pad Enter. getdir #userstartupscripts
Now every time when you start max, the script will run automatically for you.
Bonus tip!
If you have a looooooooooooot of objects(I mean really a lot), the hit testing to detect which object is under cursor might take a little bit of time. If you want to save a few milisecond. You can turn off viewport tooltip from here.
As you know, 3dsMax searches a few folder to find your asset or map files. I personally do not set any of these search folder. Either having assets in a correct folder or not. But, I know some users rely on this behaviors and even having 100s(!) of search folders.
When you save a max file, 3dsMax will try to resolve all this path which means it will try to search all these folders until it finds the map. As you can imagine, it could take some time if you have a lot of maps and especially a lot of user folders.
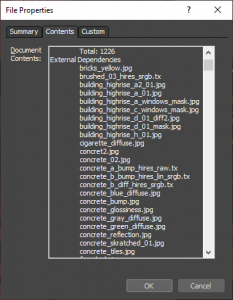
3dsMax need to resolve path for 2 reasons. First, there is the asset meta data streams. Second, there is External Dependencies file list in Properties dialog.
You can turn off this process by adding this in 3dsMax.ini. The first one will disable resolving path for properties. Second one will disable for asset metadata stream. If you want to turn on set as “1”.
Next! When 3dsMax open a max file, it will also try to revolve asset path to popup Missing External Files dialog. You can see it could take a while if you have a lot of maps with many broken or need-to-be-searched path on the network drive. Also 3dsMax will try to find every single file in IFL! One time I had a scene with many IFL sequences which total more than 20,000 images. You can imagine how painful was to load the file.
Good news! You can turn off this by setting this in 3dsMax.ini.


 Now if you go to any frames, that frame will be cached or play animation while turn off Real time playback to make sure for max to evaluate every frame.
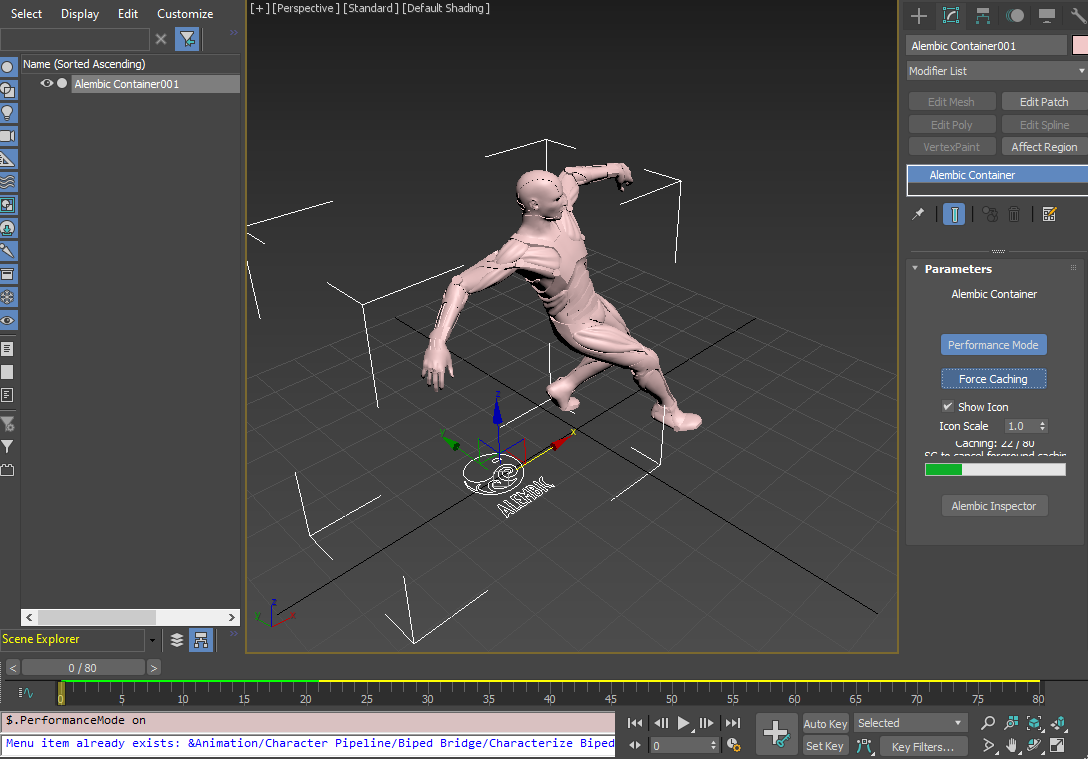
 When you use SkinWrap, your driver object need to be Mesh object. If it is not, it will convert to poly under the hood. The mesh <> poly conversion price is very high.When I tested this originally in 3dsMax 2014. The test result was 9.75fps vs 17.89fps. I retested other file in 2021.3. The difference was 10.8fps vs 13.1 fps. So, I guess there has been some progress. It is still taxing 30%.

 Some may think “why not Edit Normal modifier?” because it turns out that Edit Normals can not completely remove normal interface. So far the only way to completely wipe out explicit normal is applying


 As you know, 3dsMax searches a few folder to find your asset or map files. I personally do not set any of these search folder. Either having assets in a correct folder or not. But, I know some users rely on this behaviors and even having 100s(!) of search folders.