Menu Close

3dsMax tips #6 – Viewport GPU caching with Alembic Performance Mode

First check this video. 4.7 million tris/2.4 million verts playing @ 49fps on GTX960/Ryzen 2700X

I know you can not believe this. So, what’s the secret sauce? Alembic Performance Mode.

3dsMax 2016 introduced alembic import/export into 3dsMax. One of the feature was Performance Mode in Alembic Container object, the auto generated root object when you import alembic.

It does 2 thing.

  • Generate a Nitrous ready animated GPU cache of all children.
  • Temporarily hide all children from scene to clock any evaluation.

Even tho it was originally developed for only alembic cache, it added support for any generic object in 3dsMax 2017. So, if you make an Alembic Container object and link any object under it. You can generate the GPU for the objects just like alembic objects.

Like this. You can keep the original rig hierarchy under AlembicContainer. AlembicContainer will pick up all descendant under him.

* Sometimes explicit normals can cause issue. If you are using 3dsMax 2022.2, you can just apply Smooth modifier to clear all explicit normals. Or, check my 3dsMax tips #3 How to make imported tree animation 15 times faster

Now,Click “Performance Mode” button. You can see all object under AlembicContainer disappeared from Scene Explorer, and all geometries are combined as one cache. You can also see yellow bar on timeline which means indicated that uncached frame.

Now if you go to any frames, that frame will be cached or play animation while turn off Real time playback to make sure for max to evaluate every frame.

Or, there is a better way. just press “Force Caching” button.

Then, you will see the yellow bar is progressing as green bar.

Make sure turn off the above “Real time”, and try to scrub or play animation. This guy was playing at 42fps before. Now it is playing at 140fps.

So, this is how I could play 4.7 million tri at 48fps.

This is not perfect. But, when you have to light heavy scene, it could be very useful. Or, if you need to make preview from multiple angles. It could save time, too. But, this feature is not play well with Real time option(literally). So, it will be hard to use for animation real time preview.

A fewthing…

  • You can choose to cache geometry only since anything other than geometry will not be include the cache in anyway. But, if you put the entire rig under AlembicContainer, it will block the evaluation of the rig which will improve fps even more.
  • Even tho you could do this in 3dsMax 2017+, I recommend to use 2019+ because 2019 would only cache animation range and a lot stable than previous version.

Now I want to ask you a favor. as you can see this tool has amazing potential. But, it also misses some features. I hope I could save/load cache instead of re-generating every time when I open max file. Also, I want to explicitly choose object to cache instead of relying on hierarchy. Also, it doesn’t like when Real time playback is On. So, I created user idea item and need your vote.

https://forums.autodesk.com/t5/3ds-max-ideas/allow-to-save-alembic-performance-mode-cache/idi-p/10672171

3dsMax 2022.2 Highlights

3dsMax 2022.2 has been released with new/improved features and fixes. Here are some highlights. Please check Unofficial 3dsMax What’s New for all 3dsMax updates in detail!

Unfold3D Packing – New

The well known Unfold3D tech has been introduced to 3dsMax 2022.2.  You can enjoy Unfold3D Peel, Pack and Relax. Unfold3D Pack works great. But, it requires to have non-manifold clean faces. When it is not, Unfold3D struggle to fix by itself and usually ending up in mangled output. So, #3dsMax dev went one step further and implemented automatic uv data fix.

Unfold3D Peel – New

Unfold3D is the default algorithm used for the Peel functions now inside of 3ds Max 2022.2 with the Unwrap UVW modifier.

UV Editor Performance Improvement

Improved performance of selection and uv manipulation by multithreading and optimizing memory allocations of topology validation and selection algorithms. Also threaded and batched data gathering for uv window painting. Add modifier, opening UV editor, switching sub-object mode, selecting and transforming sub-object is now a lot faster. In the video, you can see selecting an UV element is 10 times faster.

Smart Extrude – Multi Cut-Through & Partial Merge

You can now drag a face through multiple surfaces, or drag a face partially through a volume of a mesh and it will cut and clean the geometry as expected. It has been enhanced to produce more accurate results that might occur from numerical precision on overlapping faces. The stability has been also improved when quickly moving the results back and forth before committing to a final position.

File Save Performance Improvement

File save code has been greatly optimized by caching data instead of recalculating it, minimizing moving file pointers, eliminating the object creation/destruction and setting\clearing flags instead.  Tested with 10 files which took more than a few seconds to save previously. The file save without compression is now 193% faster and 423% faster with compression on than 2021.3. In many case, turning on compress in 2022.2 is faster than composers off in 2016. I have a 6G scene(compress off) with 25mil tris. 2016 compress off took 118s to save. 2022.2 compress ON took 102s.

Pen Pressure Improvement

More device support as long as they support Wintab32.dll. (E.g. Huion, XP-Pen). Now 3dsMax 2022.2 supports the full range of pressure sensitivity that is offered by the pen tablet device by checking with the Wintab32.dll on your local Windows system. (E.g. Huion Kamvas16 support 8192 level)

Improved Hide by Category

New Qt UI. New Show Renderable Only checkbox. New Scene Contents to show only categories which exist in the scene.

USD b0.2

A lot of new features has been added since beta 0.1 including transform/animation support. Various export options include fully customizable uv data export. Ready to use pre-compiled USDView with all required Python module.

Do you like 3dsMax 2022.2 updates? Then, you will also love renderStacks 2!


3dsMax 2022.1 Highlights

I have been making some short videos to showcase the new release of 3dsMax version or Product Update. This is the collection of items for 2022.1

Explicit Normal Performance Improvement

Last year I have posted a tip about “3dsMax tips #3 How to make imported tree animation 15 times faster“.
In that post, I hinted 3dsMax dev is working on improving the situation. Finally that effort come to fruition and released in 2022.1. Now all explicit normal computation is fully safely multithreaded. My test shows 2x to 4x “overall” performance improvement. The video I attached has 4 of 25k verts characters with explicit normals(total 100k deforming verts). It went from 9 fps to 36 fps! This was no simple task and touched the core of 3dsMax. As you can see from the last a few release, 3dsMax team is putting a lot of effort for modernizing the core and improving performance.

Occlude mode for EditablePoly/EditPoly

Occlude mode is for WYSIWYG selection for Editable Poly/Edit Poly. If you turn on this mode, you can only select objects you can see. In this video, I have a tons of verts behind box. As you can see, 3dsMax is not allowing to select any verts that you can’t see if I turn on Occlude mode.

Smart Extrude Performance Update

As you can see from the last a few release, 3dsMax dev is trying to provide not only cool but also performant feature. The original implementation kind of naively looked at every mesh face as a candidate for cut-through, until it did a test to exclude the face. The new improved smart extrude is using a spatial partitioning approach to drastically reduce the number of those costly tests. Even better, this improvement could also bring more cool new features to smart extrude.

MaxFluid Loader Particle ID support for Particle Interface

Now MaxFluid loader expose ID properly to particle interface. What does this mean in English? This means any particle system that supports interface can read MaxFluid data directly. Here is an example reading MaxFluid with tyFlow and instancing shapes. The green thingies are leaves. I know I should have made it bigger.

Restore Factory Settings & Startup Failure Detection

Everybody knows “Deleting ENU folder” trick to solve many odd issues. But, you also lose user macros and script by doing so. Also you have to remember those hidden folder location. Bow, 3dsMax will reset only needed setting for you with a button. Also it will give you one click shortcut to access the folder. A new Restore to Factory Settings button has been added to the General Preferences tab to let you restore 3ds Max default settings from within the software if you experience unexpected UI behavior or performance issues. The best thing about this feature is it is not removing the entire ENU folder. It only reset the needed settings. But, if you want to reset other folders, you can choose to do so, too.


No more MentalRay missing plugin error

Hidden gem of #3dsMax 2022.1. Apparently there is one important 2022.1 feature was undocumented in release note.
A new mechanism (came with a new SceneConverter API – AddSilentClassID ) was introduced in 2022.1 to allow to hide any missing plugin data (e.g., from MentalRay). In English, you wouldn’t see this popup anymore. It doesn’t matter if the missing plugin data is in xref or material library. The new feature will simply ignore them and will not show popups.


Here is the details from dev.
—————————————————————————–
By default, the scene contain only following types of MentayRay data which polluted scene even MentalyRay plugin was never touched wouldn’t trigger MissingDLLs and SceneConverter dialogs on file open.
mental ray: material custom attribute
mental ray: Displacement Custom Attributes
mental ray: Indirect Illumination custom attribute
mental ray: light shader custom attribute
If you want to hide more plugin data for missing plugin cases (not limited to MentalRay plugins) on file open, you can:
  1. Open 3ds Max 2022 Installation Folder\stdplugs\stdscripts\SceneConverter.ms
  2. Add a maxscript call to SceneConverter.AddSilentClassID with the class_id you want to hide. E.g, hide MentayRay mr Area Spot light objects:
  3. SceneConverter.AddSilentClassID #(0x0001b669L, 0x000875c2L) –mental ray: mr Area Spot
  4. Restart 3dsMax
NOTE: On file open, all plugin data from missing plugins will be removed automatically if “Automatically remove missing legacy assets on File Open” is checked, otherwise, they will be kept in the scene, and you can use Scene Converter later to remove or convert them. Remove all SceneConverter.AddSilentClassID calls from SceneConverter.ms will restore old behavior.

renderStacks is waiting for you. Click here!


3dsMax 2022 Modifier Modernization & Performance Improvement (includes 3dsMax 2021 PUs)

3dsMax is now 25 years old program. But, that doesn’t mean that all its core is 25 years old. The core of 3dsMax has been continuously updated and being updated at this moment. Upgrading core while not breaking the existing feature is a monumental task. It is very difficult and somewhat boring. But, that hasn’t stop 3dsMax team.

After 3dsMax 2021 has been released, 3dsMax developers put some great effort for modernizing modifiers and underlying cores related to modifiers I made a comprehensive list of the efforts since this kinds of things are hard to show as video.

EditPoly Remove Edges/Vertices [2533x!]

This was a typical case of “a good sample file load to fast and effective fix” case. I had to lower the poly count of a model which already had animation. I applied Edit Poly and was removing many extra loops. But, it was so slow as I remove more and more loops. I sent the max file to 3dsMax dev team. I got the fix. 3dsMax dev accelerated EditPoly Remove edges (with ctrl on) and Remove vertices in various places (including EditablePoly). How much is it improved? A LOT. REALLY A LOT.

I tested on an object with 318402 verts  and removed 238,800 verts from it.
2021.3 : 4276.9 seconds
2022 : 1.688 seconds : 253370% improvement
2533 times faster!

Since Edit Poly is recomputed when you open a max file. It will also improve file loading time a lot if you have many deleted many verts with Edit Poly.

This change break backward compatibility. This means you will not see improvements when loading old files. Only the newly added Edit Poly modifier will use this improvement. Saving to previous versions will collapse EditPoly.

Bevel Faces and to a lesser extent Chamfer Edges [22x]

3dsMax dev accelerated underlying algorithms of Bevel Faces and Chamfer Edges.  This change will also accelerate any code which uses max’s “mesh clusters”. One of test showed.
2021.3 : 85 seconds
2022 : 4 second. 2125% improvement

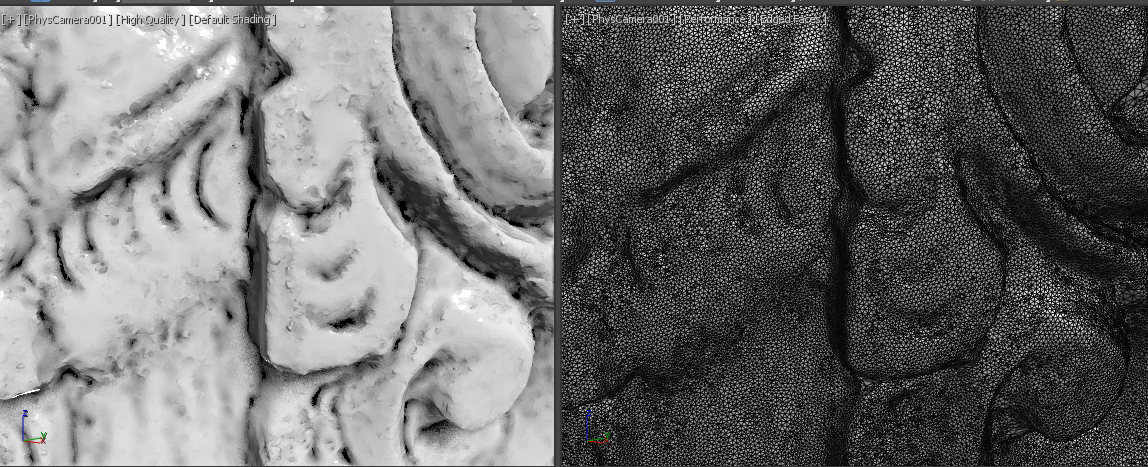
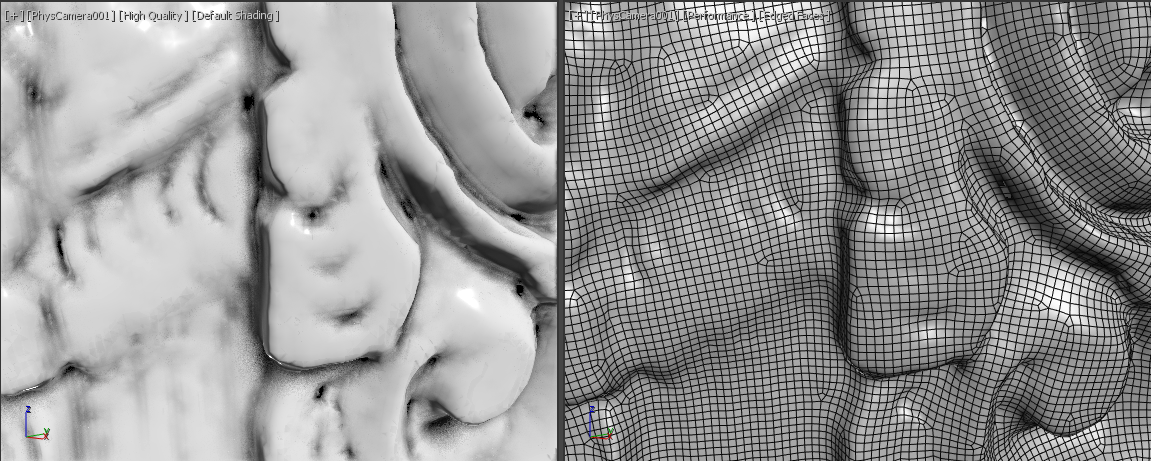
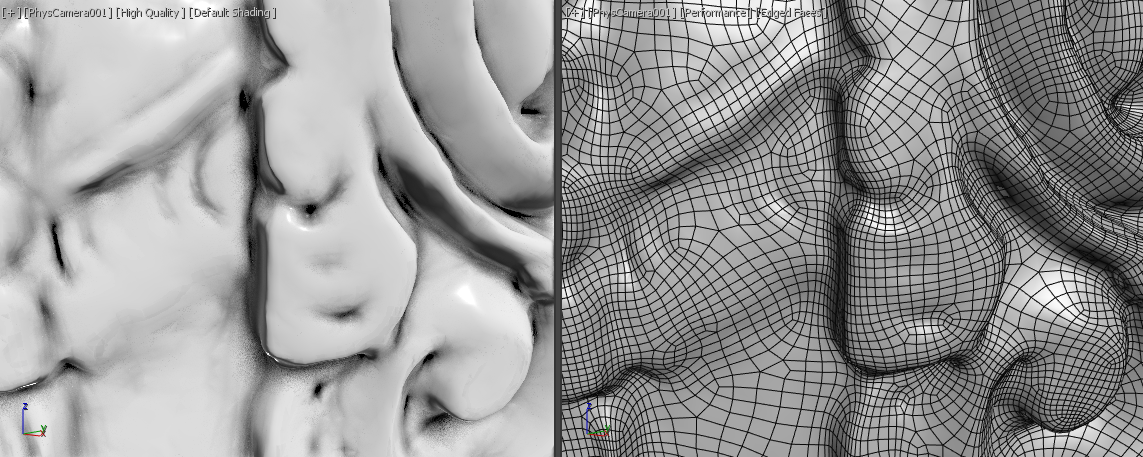
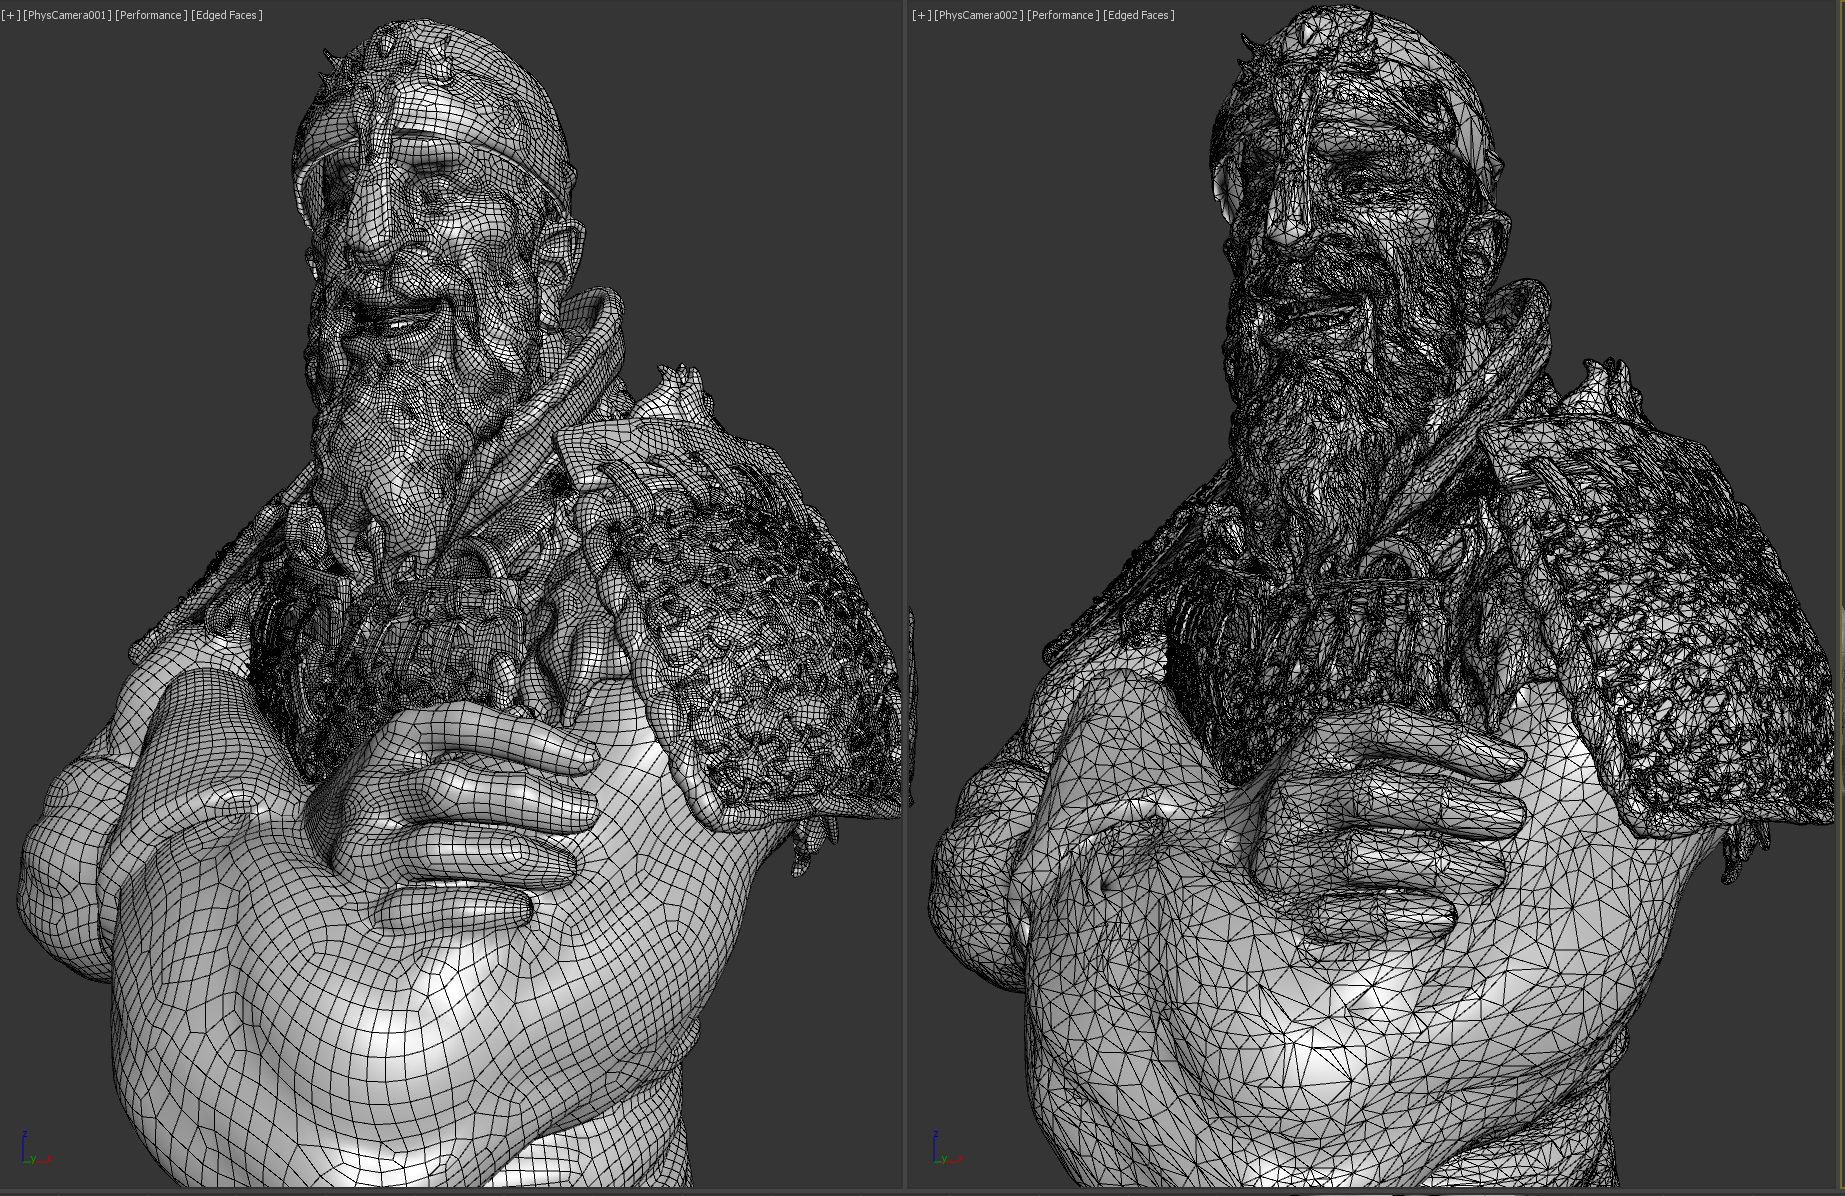
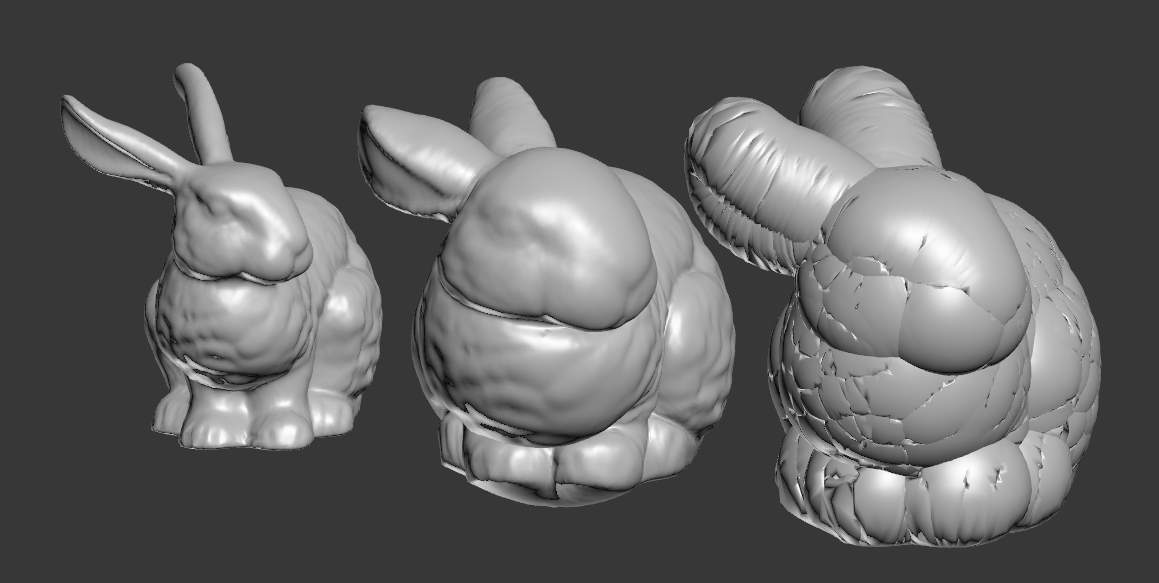
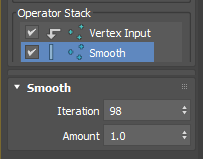
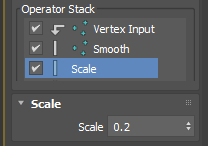
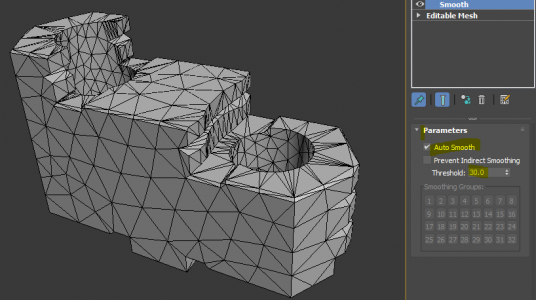
Auto Smooth [ 3.8x – 3057x ]

The underlying auto smooth algorithm has been totally revamped which means this improvement not just for Smooth modifier. EditableMesh and EditablePoly AutoSmooth command, EditMesh and EditPoly Autosmooth command, Autosmooth modifier and Renderable Spline with Autosmooth on.

The performance gains are significant. Yes, you saw it right in the headline. One of models showed 3000 times faster performance. The particular model was tree from MaxTree. Tons of elements. Most million+ big mesh shows 30-40 times faster performance. Now Smooth modifier is faster than any other 3rd party solution.

MaxTree model / Verts : 4,467,434 / faces  : 1,381,628
2021.3 :  6664.69 seconds
2022 : 2.18 seconds : 305719% improvement
3057 times faster

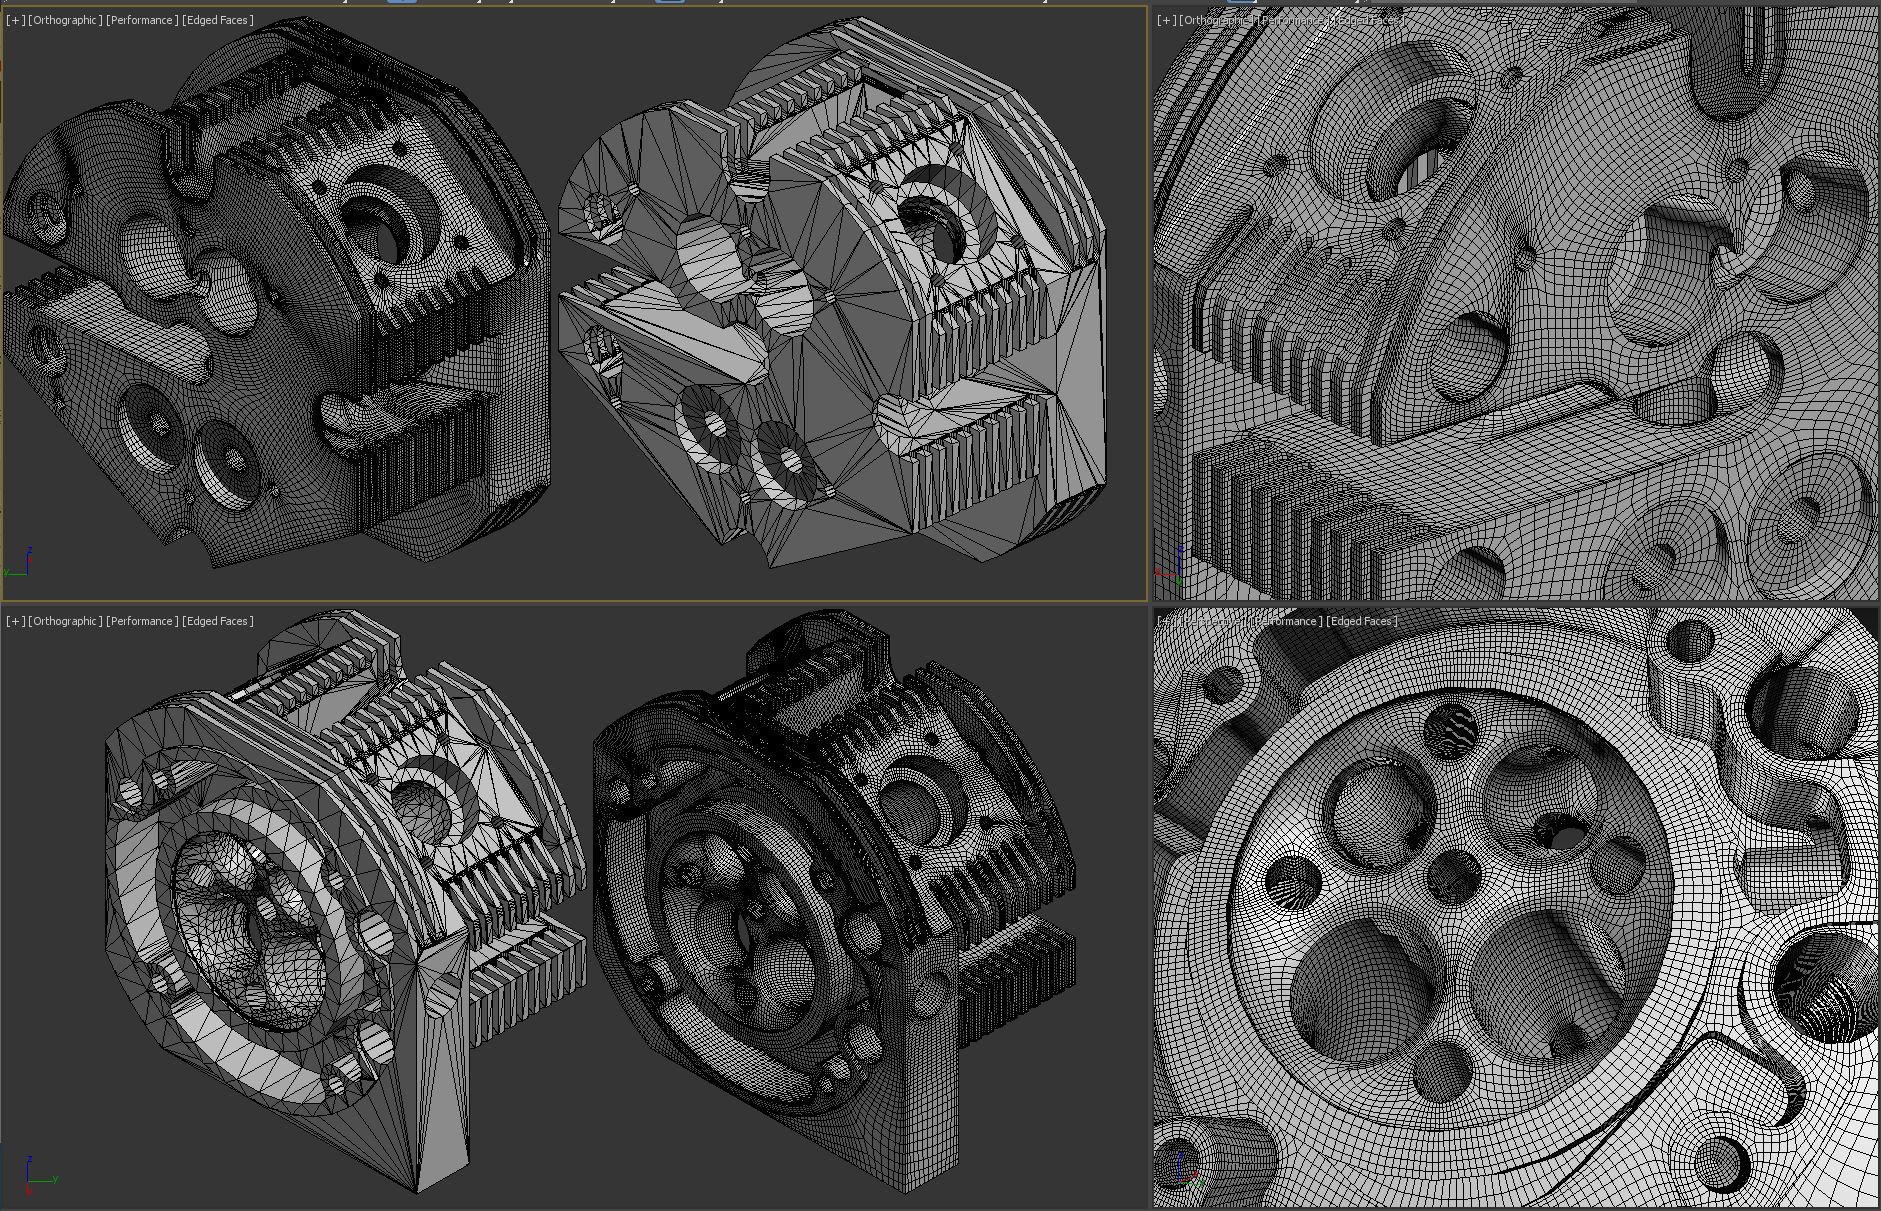
An Engine CAD model / Verts : 2,260,497 / faces  : 4,516,570
2021.3 :  74.853 seconds
2022 : 2.207 seconds : 3391% improvement

Turning on Enable in Viewport for an imported spline pattern / 523k knots.
2021.3 : 724.388 seconds
2022 : 12.432 seconds : 5826% improvement

Extrude [ 4.5x – 130x ]

Optimized capping provides significant performance improvement for complex shape with a lot of elements. Also it is now cache the capped shape. Therefore, when you adjust the amount value, you can see the change instantly.

A spline with 220 spline / 523,176 points
2021.3 : 3576.56  seconds
2022 : 27.7 seconds : 12911% improvement
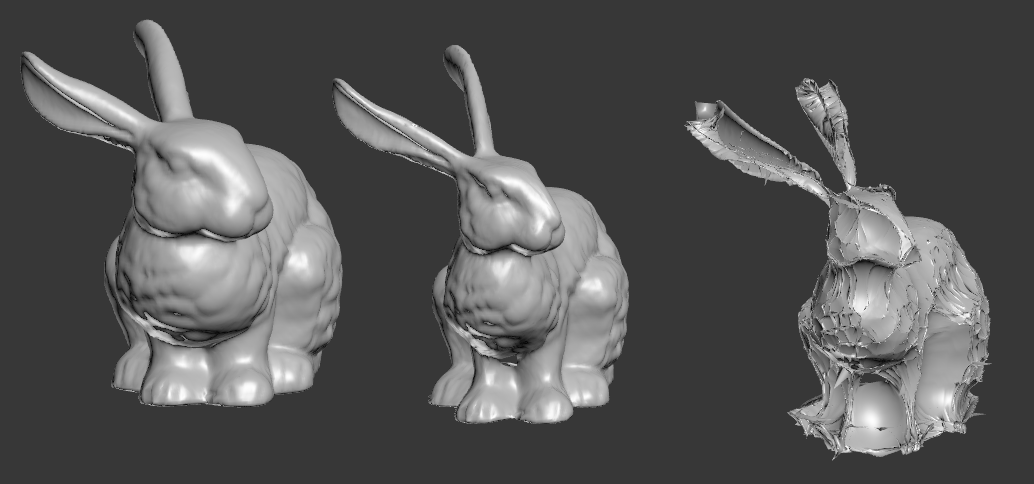
Relax [ 1.5x – 3x ]

It is fully multi-threaded now. It also provide the volume preservation option.

Stanford dragon model / Verts : 3,609,455 / faces  : 7,218,906
2021.3 :  21.5 seconds
2022 : 7.22 seconds : 297% improvement

Slice/Symmetry [ 1.5x – 3x ]

This modifier has some story. In the legacy Slice modifier, there is a mode button at the bottom which is set to “Poly” by default. I never paid attention to this button. But, apparently this button determines which data structure Slice would operate on. That means if you apply a Slice modifier on a mesh object. It will convert to editable poly first(!) and slice. This means there will be the conversion tax. On top of that, slicing poly is slower than slicing mesh. When I change the mode to mesh for highres mesh object, even the legacy Slice was not that slow.

Now, “Automatic” option has been added and is ON by default. It will use whatever native type which is coming from stack. BUT! Here is a catch. Because mesh slicing in 2022 is so fast now. Even with conversion tax, slicing in mesh mode is always faster. Therefore, I recommend to set to mesh especially you would use mesh for the above level.

Measuring performance was a little bit tricky because the shape of slice has greater effect than tri count. So, I applied Slice and animate rotation and measured the average time.

Stanford dragon model / Verts : 3,609,455 / faces  : 7,218,906
MESH
2021.3 :  2.88 seconds
2022 : 1.00 seconds : 286.73% improvement

I mentioned that 2021.3 default is set to “Poly”. If I don’t change this option as Mesh. It took  9.49 second! Therefore, when you apply Slice modifier on a mesh object. the improvement is actually 900% compare to 2021 when you use the default option.

POLY
2021.3 :  7.22 seconds
2022 : 5.08 seconds  – 141.95% improvement
2022 as mesh : 2.52 second – 286.66% improvement

One more tip. When your sliced a section with a lot of elements, somehow mesh slicing slowed down a lot. It is not sure what is causing an issue as of now. But, dev need to investigate what’s going on. Good news is. Poly performs very well for this case.

This is a test with 100 elements in section.
2021.3 Mesh : 4.91 seconds
2021.3 Poly : 0.22 seconds
2022 Poly : 0.19 seconds

PathDeform [ 3x – 20x ] – 3dsMax 2021 PU3

PathDeform is now fully multi-threaded. You can see hi poly models shows 20 times faster performance.

A CAD Tank thread model / Verts : 1,078,300 / faces  : 2,161,000
2021.3 :  63.463 seconds
2022 : 2.793 seconds : 2272.4% improvement

Stanford dragon model / Verts : 3,609,455 / faces  : 7,218,906
2021.3 :  9.773 seconds
2022 : 0.497 seconds : 1966% improvement

Push [ 1.5x – 5x ] – 3dsMax 2021 PU2

PathDeform is now fully multi-threaded. In the past, poly was performing worse than mesh. Now it is fixed. There is not much difference between mesh and poly. Therefore, you will see bigger improvement on poly objects.

Stanford dragon model as poly  / Verts : 3,609,455 / faces  : 7,218,906
2020 :  2.623 seconds
2021 : 0.842 seconds : 311% improvement

Have you tried renderStacks?

DCM mini tutorial #1 – Smooth Push

I made this DCM(DataChannel Modifier) while ago to help my friend’s shot. I thought that it might be worth as my first DCM mini tutorial. So, here we go!

Let’s see the following picture. This is the famous Stanford Bunny model. Left is the original shape. The right is 3dsMax Push modifier. As you can see, when you push a lot the faces start to overlap. The middle is the result of “Smooth Push” which is a simple DCM setup. As you can see It pushed it, but it pushes more gently(?).

How Push modifier works is really really simple. It moves each verts along the its normal by the given amount. As you can see, Push modifier only has one parameter which is the distance the verts are moved along normals.

Becase the verts move along the normal, verts will meet each other if you have concave shape. To prevent that, I simple smooth or blurred or relaxed the normals and used that. Let’s see how that translate to DCM setup.

First, we need to get vertex normal for each verts.

  1. Click “Add Operator”
  2. Add “Vertex Input”.
  3. Choose “Average Normals”.

As an Input operator, Vertex Input allow you to grab various data from each verts. The 3 dot icon in front of operator name indicates, you are processing vertex data.

Next, Add “Smooth” operator from Process operators. It has 2 values, Iteration and Amount just like Relax modifier. The bigger Iteration and Amount is, the the smoother result you will get. This operator will make more gentle normals by averaging normals with neighboring normals just like blurring an image.

Now we need to have a way to control amount of Push. This is simple. Let’s add “Scale” operator from Process operators. This operator multiplies the given value to float or vector. If the value is 1.0. The size of normal doesn’t change. If the value is 1.0, you ar making normal bigger. If the value is less than 1.0, you are making normal smaller. This is exactly what “Push value” in Push modifier does.

What we have now in the current Data Channel is the offset vector of the each vertex. So, you need to add these vectors to the original vertex position.

  1. Add Vertex Output operator from Output operators.
  2. Choose “Position” as output channel.
  3. Change “Selection Method” from “Replace” to “Add”, which means you will add the current channel data to the existing vertex position data.

Dadah! You have a Smooth Push! Easy, right?

You know what’s also easy? renderStacks! Try it, your rendering life will become 1000% easier!

3dsMax tips #5 – Make SkinWrap faster

Often the riggers skin a low res character and use it to drive hires version of character with SkinWrap modifier.

When you use SkinWrap, your driver object need to be Mesh object. If it is not, it will convert to poly under the hood. The mesh <> poly conversion price is very high.When I tested this originally in 3dsMax 2014. The test result was 9.75fps vs 17.89fps. I retested other file in 2021.3. The difference was 10.8fps vs 13.1 fps. So, I guess there has been some progress. It is still taxing 30%.

Skin modifier doesn’t care about poly or mesh. Therefore, if your base object is Editable Poly, just apply Mesh Select before Skin. You will get performance boost.

3dsMax 2021.3 Retopology Modifier Quick Start – Part.2

OK. Part.2! In this post, we will focus on object with hard edges like booleaned model or CAD data.

Booleand Model

Booleaned model is usually pretty easy. Applying Retopology modifier, set the target number and pressing Compute is enough.  But, again it might fail sometime, and you simply want to get better result. So, here is some tips for booleaned model.

Tips

  • Utilize Boolean Seams for very low angle sharp edges
  • Regularize option can help to get more even quad distribution and prevent spiral loops.
  • Adding Subdivide modifier can help a lot to solve and get better result.
  • Having some support edges helps to get better edge flow. Especially for flat circular shapes.

Example

Here is an example. I just apply Retopology modifier, set target to 3000 and just pressed Compute. Auto Edge was on with Smoothing group by default. We got something . But, the topology doesn’t look that great, especially the center circle.

So, I went back to the center boolean operand and give some Cap segments. You can see it makes better edge flow on the big one circular ngon.

Or, you can just add Subdivide modifier. I usually use “Adaptive” option with default. You can see the edge flow is a lot better for both center circular area and front flat face.

Let6’s see one more example. For this kinds of source object, you must Subdivide.

The Retopology result looks good. But, it has an issue. It created the infamous spirals.  I fixed with by increasing Regularize to 1.0. Again this option doesn’t guarantee to remove all spirals. But, certainly worth to try.

CAD Data

Source Preparation

I guess I don’t need to explain how bad models from CAD can be. You all already know. The new algorithms in Subdivide modifier certainly does great jobs for making more Reform friendly faces. But, the mesh has split edges and inverted normal and overlapped double faces what not. Reform nor Subdivide will fail. Until we have T-1000 to retopo, you still gotta do what you gotta do. Here are some notes on mesh preparation.

  • Weld split edges and unwelded vertex. Reform would now know if that’s real edge boundary you want to keep or just bad meshed. The easiest way to check this is applying Relax or TurboSmooth. You will be able to see split edge easily. Then, you could apply Vertex Weld modifier with Threshold 0.001 to fix it.
  • 3dsMax 2021.3 provide Mesh Cleaner modifier. Try that. It also fix some issues.
  • Check if normal is flipped between neighboring faces. Unify option in Normal modifier could help.
  • Delete very small random elements with only few polygons especially for scanned data.
  • Sometimes Quadrify modifier fixes bad topology since it rebuilds meshes. You can also try TurboSmooth with iteration 0.

Tips

  • If it is small part, you can just treat like booleaned model, But, if it has complicated shape, evaluate how much minimum target is needed with Auto Edge OFF.
    If the target is too low, Reform often cause “IPOPT maximum iterations exceeded” error” which means basically Reform saying “I can’t solve this.”. By turning off Auto Edge, you can quickly check how much target is needed.
  • When you Auto Edge, you need enough information within the auto edge boundaries. If you don’t have enough information, again you will meet “IPOPT maximum iterations exceeded” error”. To increase the information, there are 2 options.  1) Subdivide more 2) Remove auto edge condition. For example, if you use UV seams, you could stitch unnecessary seams. If you use Smoothing group, you can smooth some minor edges.
  • Check if your hard edge is coming from the smoothing group or explicit normal. If you only have explicit normals for hard edges and turning on only smoothing group means you don’t get any hard edges. If you are lazy like me,. you can just use Angle option instead of Smoothing Group or Specified Nornal option.
  • Sometimes model could have bad smoothing group and that prevent Subdivide modifier to work properly. Use Smooth modifier to clean up smoothing group.
  • Since Retopology doesn’t preserve mesh data yet. It will look all smooth after it solves. Apply Smooth or Weighted Normal to check hard edges.
  • Often CAD data has nice UV seams, utilize it.

Example

This is a part from Fusion 360 sample scene. It had a unique problem. So, I thought that it was good example to show how I processed the model. You don’t have to go through like this for every model!

This is the source model.
The First attempt with Specified Normal. I got solve. but, I don’t like the edge flow.
I applied Subdivide modifier and set to Adaptive. OK.. something is wrong. I still see a lot of thin edges. This is because there are many smoothing groups there.
I cleaned smoothing group. Subdivide look better.
Retopoed again. Better edge flow. But, I want to improve.
Subdivided more and set Regularize to 1.0.

Then, I was thinking how about go lower res model and TurboSmooth?

This is 2000 target.
Chamfer and TurboSmooth!

OK, I shared all things I have learned during beta testing. If you think it is helpful. Please visit renderStacks!

Also don’t forget to check Autodesk Learning Channel Retopology Tutorial.

https://www.youtube.com/watch?v=sKEu2Gs3G_U
https://www.youtube.com/watch?v=HhUMdy-0kSI
https://www.youtube.com/watch?v=AUikqN_lVPc


3dsMax 2021.3 Retopology Modifier Quick Start – Part.1

The new Reform algorithm in the new Retopology modifier in 3dsMax 2021.3 is a definitely one of the best automatic retopology tech on the market. But, this is not driven by crazy AI nor a silver bullet to solve everything with a click. You need a different approach for a different case to get the best result in short amount of time. This is a collected notes from my beta testing period. I hope you find it useful.

Scanned Data

OK. This is easy one. For any organic models, just 2 things.

  • Turn off Auto Edge. This is for preserving sharp edges for hard surface model.
  • Decimate with ProOptimizer A LOT. I mean really a lot. Usually the rule of thumb is matching ProOptimizer verts count to Target count gives you best result in the shortest amount of time.So, if you want to get 40,000 poly mesh, ProOptimized to 40,000 verts first the Compute. Think this way. if your target is 30,000 poly from 2 million poly source. You will not get all the details of 2 million in anyway. There is no reason to feed all those noise data to Reform.
  • If you want to retopologize to really high poly count to reserve all scanned details and Retopology doesn’t solve with that mesh, try InstantMesh mode as a pre-process instead of ProOptimizer. You can’t decimate as much as ProOptimizer with it. But, it generates more Reform friendly mesh. Therefore, it will give you a higher chance to get result.

Tips

  • If you want to process even faster? Then, apply Relax modifier before ProOptimize. You could get faster result in exchange of the loss of details.
  • After ProOptimize if you have very big flat polygon. Remove it or subdivide a little. This kinds of big single polygon can make Deform fail. I’ll show you in the following example.

Example

This is scanned model from Konrad O?óg, www.aunar3d.com. Thanks for the model. It has 1.95 million verts and 3.9 million tris. Look at that beautiful wireframe on right. If you just apply Retopology on this and press Compute. It will takes days.

I applied ProOptimizer and went down to 2%, 39012 verts. As you can see from the shaded view. ProOptimizer does great job for reducing poly count while keeping shape intact.

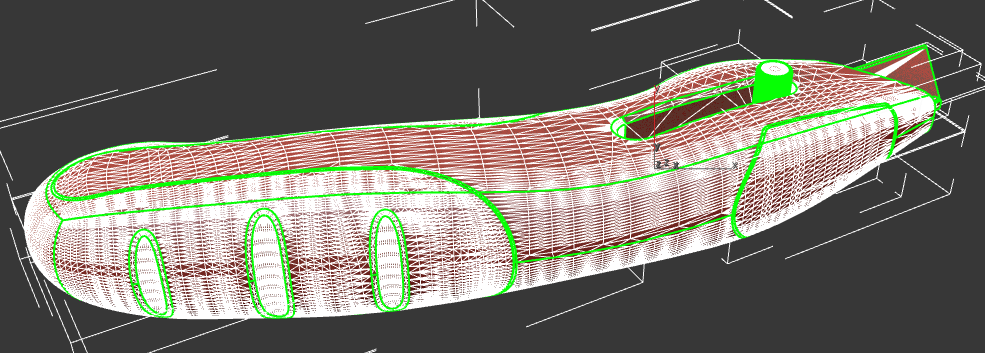
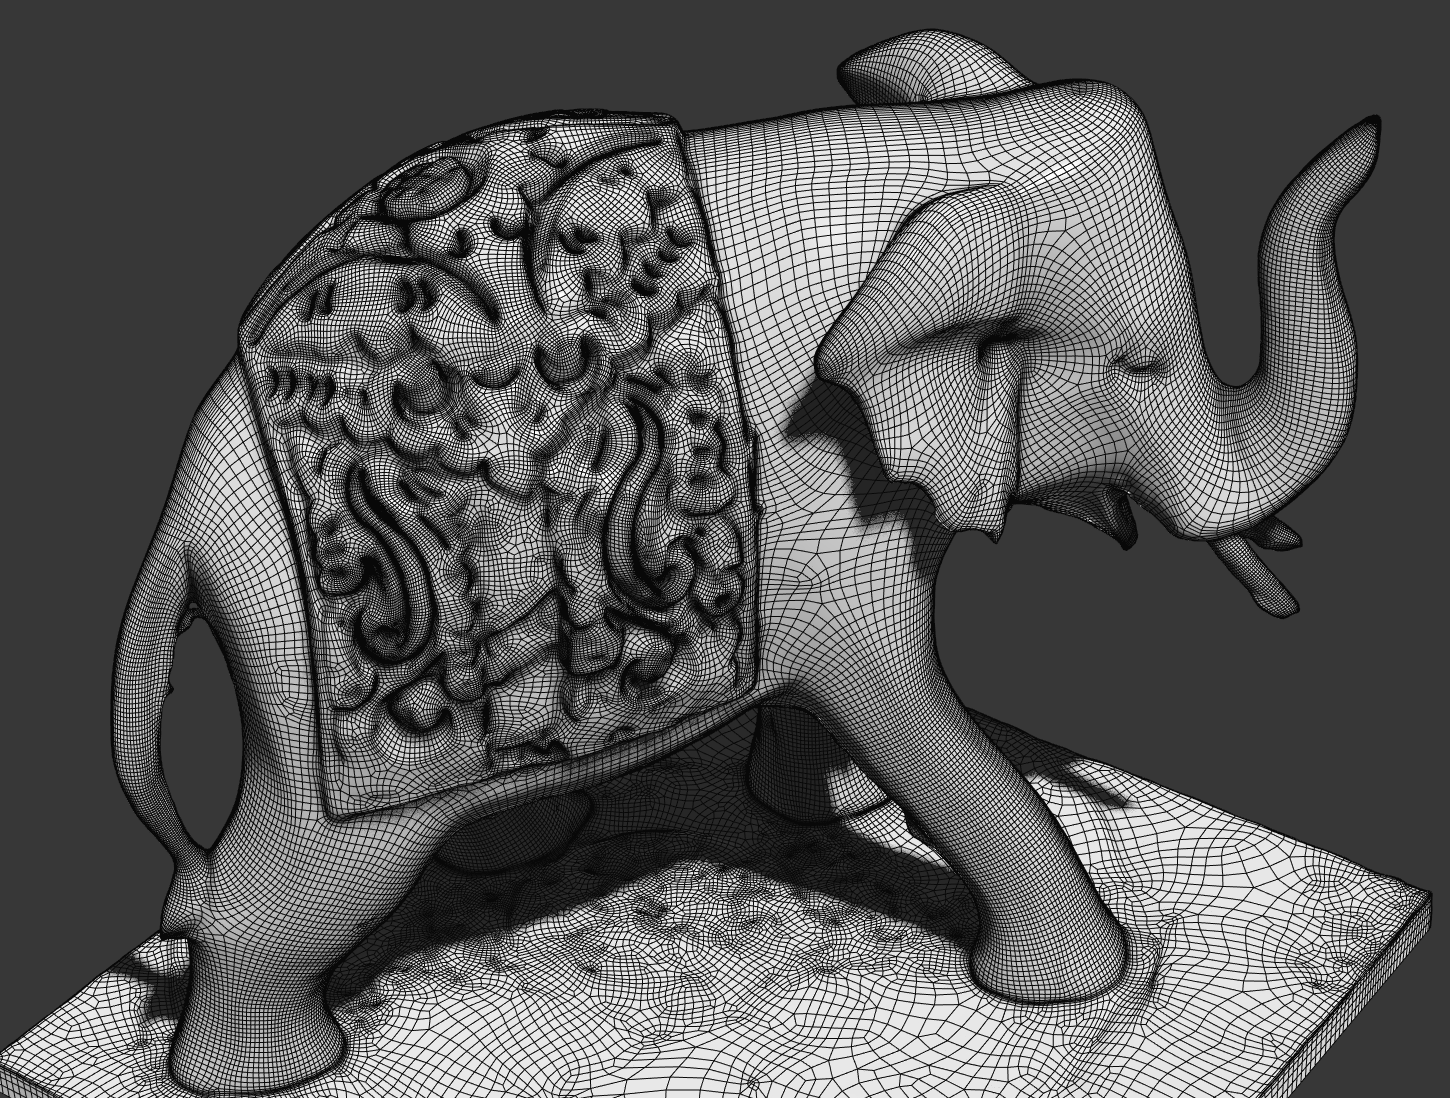
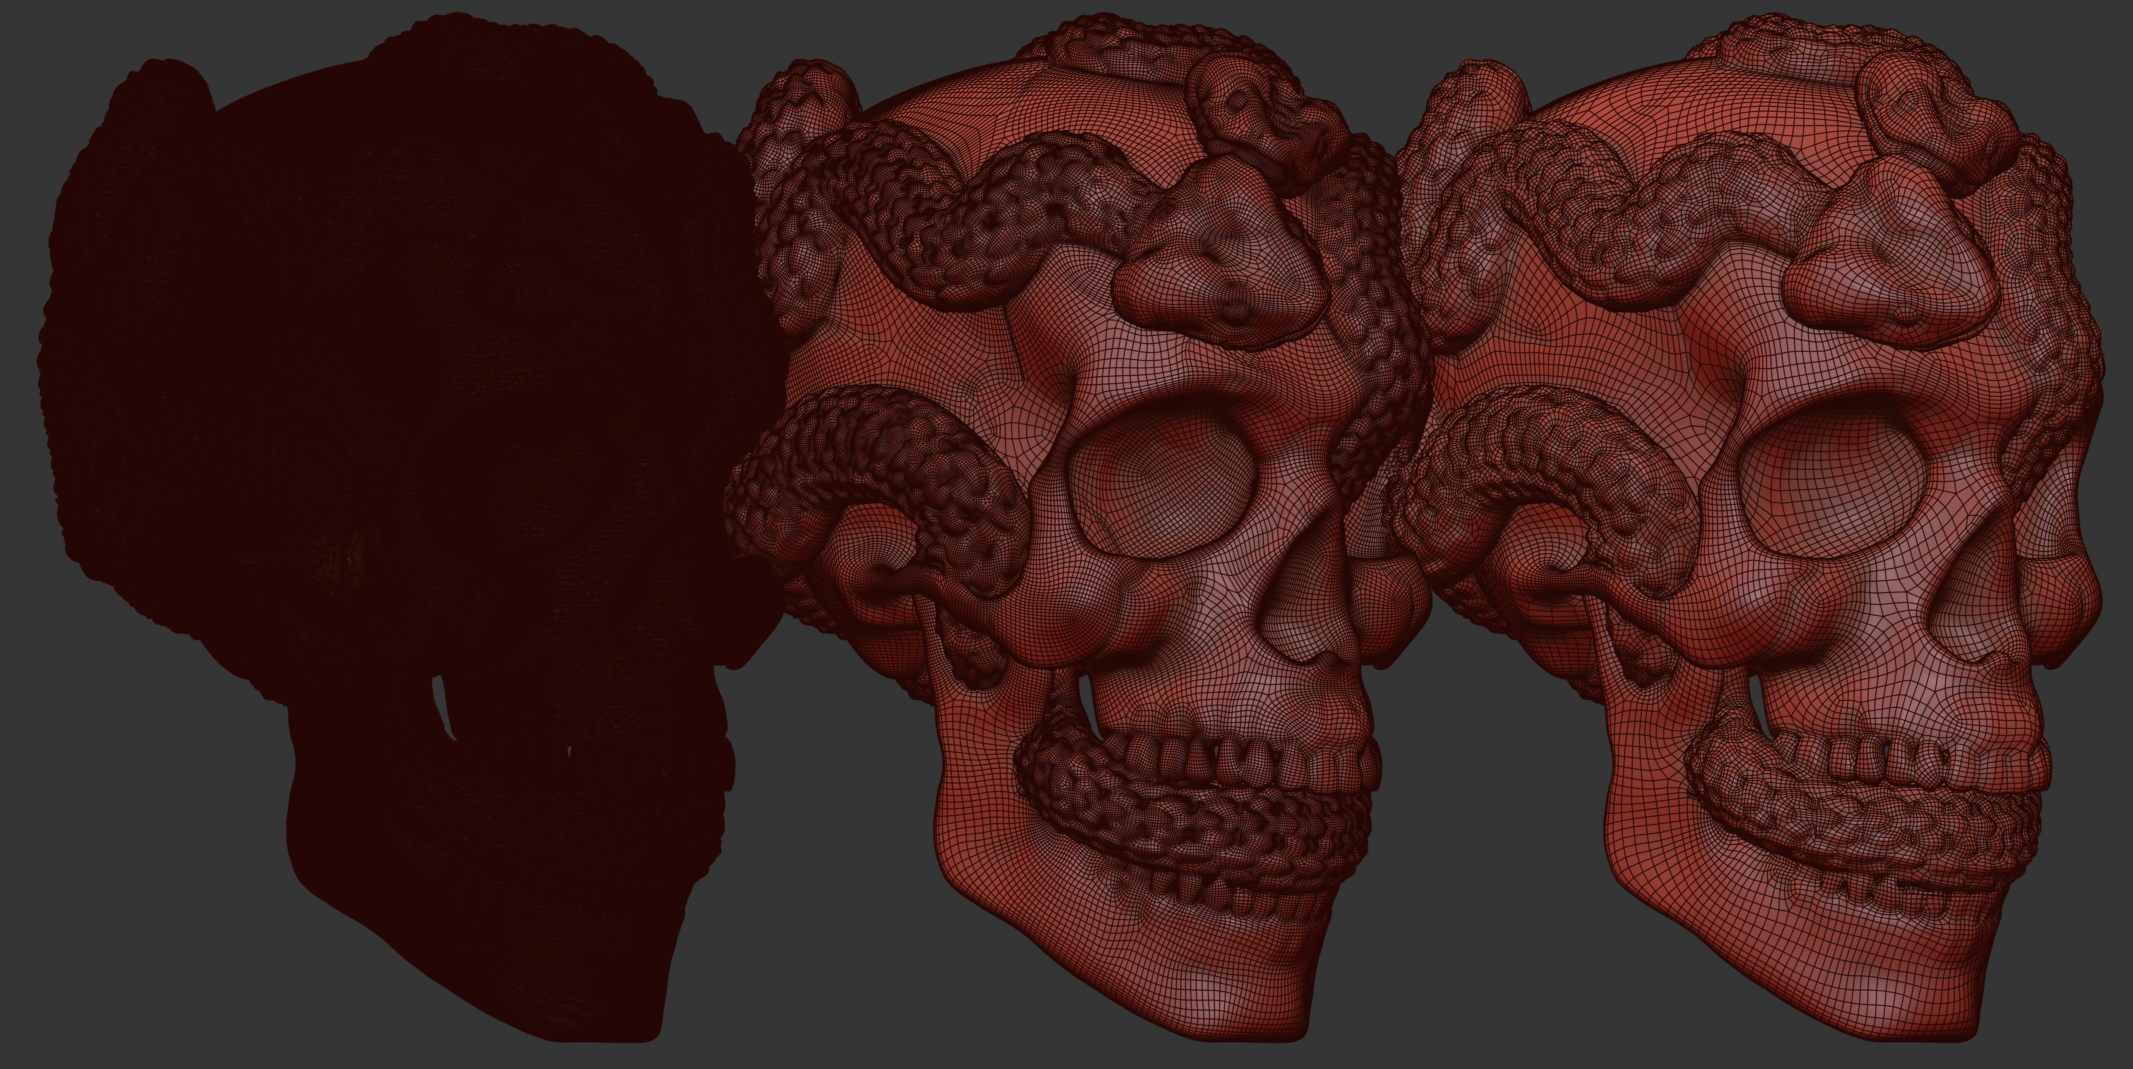
Then, I had a hiccup. This big lowres place at the bottom was throwing a wrench. I could subdivide this. But, I simply delete it. You don’t see anyway. Also I can recap later.

I turn off Auto Edge and set Target Face Count to 40,000. After 100 second. I got this with 43,000 poly.

The following images are high resolution retopology example using InstantMesh as a pre-process. I pre-processed to 500,000 poly with Instant Mesh and Reformed it to 150,000. It took 20 min on Ryzen 2700X.

Original scan – 1.95 million verts / 3.9 million tri
InstantMesh – 475k verts / 494k quad
Reform – 163k verts(1/11 of original) / 162k quad

Do you want to make your render life 1000% easier! Click here!

Also don’t forget to check Autodesk Learning Channel Retopology Tutorial.

https://www.youtube.com/watch?v=sKEu2Gs3G_U
https://www.youtube.com/watch?v=HhUMdy-0kSI
https://www.youtube.com/watch?v=AUikqN_lVPc

3dsMax 2021.3 Retopology Tutorials Video Collection

Max’s New Remesher is INSANE!

Simple Trick for Perfect Retopology in Max

Introduction to Retopology Tools for 3ds Max®: Retopologizing CAD datal

Introduction to Retopology Tools for 3ds Max®: Retopologizing a Booleaned Model

Introduction to Retopology Tools for 3ds Max®: Retopologizing a Scanned Mesh

Retopology in 3ds Max. Tips & Tricks

3ds Max Retopology

3ds Max Retopology from Jose M. Elizardo

Boolean Mesh Retopoly pitfalls

Miro Retopo

Gladiator Hulk Retopo

3D Studio MAX 2021 Retopology Tools – Adán Martín

Now time to check renderStacks!

3dsMax 2021.3 New Retopology Modifier Test Gallery

3dsMax 2021.3 has been released. The biggest addition of this update is the brand new Retopology modifier. I’ll have another post for the collection of showcase and tutorial videos.

It comes with 3 algorithms to choose, Reform, InstantMesh and QuadriFlow. Reform is the internally developed Autodesk’s own retopology engine.

I have had a chance to beta test while is was developed. This post is the collection of images that I have created while beta testing. I tried my best to test many different types of sources includes 3D scanned model, ZBrush sculpting, CAD import, booleaned meshes and more. Enjoy!

Make sure click image to see big to see wireframe better. Under the image I also tried to post the original source of model as much as remember.

ZBrush Sculpt

296k , 408k

201,881 Poly
Original model 1.2 million poly
Close up
60k, 210k, 2.8mil

732k / 86k / 32k / 20k / 8.6k vets

Do you like new Retopology modifier? renderStacks is as good as this for rendering! Click here to learn!

Scanned Model

https://sketchfab.com/3d-models/lowe-von-asparn-57a57a99ce1f4e45adee5ae37a91f51b
100mil / 300k/ 100k verts
857k / 513k / 116f faces


1.5 mil vs 220k https://www.artec3d.com/

CAD Import

Boolean

Up Resolution

One more chance!  Click here to learn about renderStacks. It will change your rendering life!


52,464 / 106,302 / 246,787 / 394,237 https://gumroad.com/l/xAQxj